Saturday, December 24, 2011

Cream Cheese Penguins

Here is one of the appetizers I made for Christmas. I invited some friends to join us for dinner and when I put the penguins on my table they started to laugh and to take photos to post them on facebook, it was a big hit. The only problem is that nobody wanted to eat them because they are too adorable.

Anita B - all rights reserved
Jumbo or large black olives, pitted
Small black olives
1/2  package cream cheese (4 ounce), room temperature
1 large carrot

With a sharp knife cut a slit from top to bottom, lengthwise, into the side of each jumbo/large olive.
Using a teaspoon carefully insert cream cheese into each olive. Smooth the surface with wet finger.

Slice the carrot into eighteen 1/4 inch thick rounds. Cut a small triangle out of each carrot slice. Insert the carrot triangle in a small olive to make the beak

Cut a small notch out of each carrot slice to form feet. Save the cut out piece and press into center of small olive to form the beak. If necessary cut a small slit into each olive before inserting the beak.

Set the stuffed olive, large hole side down, onto a carrot slice.
Set the small olive with the beak onto the large olive.
Secure with a toothpick.

They are super cute, easy to make and a lot of fun. It takes maybe 20-30 minutes first time, after that it's a piece of cake. 

Note:
You can make scarf from roasted bell pepper if you still have patience :-) just cut long strips or pepper and put them around the neck. 
Use goat cheese or add herbs or garlic salt to the cream cheese if you want more flavor.


Tags: Cream Cheese Penguins recipe, Cream Cheese Penguins appetizer, Cream Cheese Penguin recipe, Cream Cheese Penguin recipes, Cheese Penguins recipe

Merry Christmas!


Hope you all have a wonderful Christmas!

Well, this is Santa’s big day. He’s leaving the North Pole for his journey around the world bringing gifts to everyone who has been good this year.

There are a lot of gifts under our Christmas tree this year.

I received a lot of gifts already, I got a Kitchen Aid stand mixer this year, I call it "my Sous chef" " :-), I received a butcher block last week so I think I received my gifts already. Let's see if there are more under the tree.

I hope you all baked some good cookies for Santa, you know he loves them. Oh yeah don't forget the carrot for Rudolph :-)

Merry Christmas!

Wednesday, November 16, 2011

Ham and Mushroom Stuffed Turkey Breast

I make this dish often, not only for Thanksgiving and Christmas. We love it, it is sooo good. Sometimes I use chicken breast or turkey, you can add cranberries or sausage into the stuffing. Serve it with roasted vegetables, mashed potatoes, just use your imagination.

Ingredients:
Anita B - all rights reserved

1 turkey breast, removed from the bone, about 2-3 pounds
12-15 slices bacon
2 carrots, peeled and cut into 1/2-inch dice
2 ribs celery, cut into 1/2-inch dice
½ lb mushrooms, whole
1 cup chicken stock
1 cup dry white wine
Thyme bundle
Kosher salt
Black pepper


For the stuffing:
2 tablespoon extra-virgin olive oil
1 large onion, diced
2 cloves garlic, crushed
1 cup ham, diced
1 cup small button mushrooms, diced or cut in quarters
6-7 sage leaves, finely chopped
½ teaspoon fresh thyme
2 cups bread crumbs
2 eggs
1/2 cup water

Directions:
Add oil in a large sautee pan, add chopped onion, salt and sautee on medium heat until they are soft and translucent, about 10 minutes. Add garlic and cook for another 2-3 minutes.
Anita B - all rights reserved
Add ham, mushrooms, black pepper, sage and thyme and cook until mushrooms are nicely browned.
Turn off the heat
Anita B - all rights reserved
.
Add the seasoned stuffing and water or chicken broth. Taste and adjust seasoning.
Set aside and let it cool. When the mixture is cool add 2 eggs and mix well.

While the mixture is cooling prepare the turkey breast.
Remove bones and skin and place it onto a cutting board. Butterfly each half. Season with salt and black pepper. Set aside.
Anita B - all rights reserved

Lay about 5-6 pieces of butcher twine on your cutting board. Lay bacon slices on top of them, slightly overlapping. Arrange the turkey breast on top of the bacon. Lay the stuffing mixture in the middle of the flatten turkey breast and lift the 2 sides of the breast to form a log. Wrap the bacon slices around the meat and tie with the twine.

Preheat the oven to 375 degrees F.

Put the stuffed turkey breast, seam side down, into the skillet and sear until the bacon is crisp and the turkey is lightly browned, about 4 minutes on each side.

Anita B - all rights reserved
Transfer the turkey breast to a baking sheet.
In the same skillet sautee a medium onion, 2 carrots and 2-3 stalk of celery until nice and soft, about 7-8 minutes. Season with salt. Put the vegetables around the turkey breast in the baking sheet.
Anita B - all rights reserved
Arrange the whole mushrooms around the stuffed turkey breast. Add the thyme bundle, chicken stock and the whine and put it in the oven.

Anita B - all rights reserved
Roast the stuffed turkey breast for about 1 hour or until the turkey is cooked through and the internal temperature register 160 degrees F on an instant-read thermometer. The cooking time depends on how big is the turkey breast. Baste with the chicken stock and wine mixture every 20 minutes.

Anita B - all rights reserved
Place the turkey breast onto a cutting board, cover with aluminum foil and let it rest for about 15 minutes before slicing.
Anita B - all rights reserved

Remove the twine and slice into medallions. Arrange on a serving platter and serve with roasted vegetables or mashed potatoes. Drizzle with the juice from the pan.

Tags: Ham and Mushroom Stuffed Turkey Breast recipe, Ham and Mushroom Stuffed Turkey Breast, Stuffed Turkey Breast recipe, turkey recipes, turkey roulade recipe, turkey roulade recipe for thanksgiving, christmas recipes

Saturday, November 5, 2011

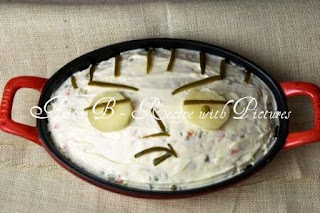
Stewie Salad

I posted this recipe a long time ago. I will post it again, just because I think this deserves a separate post. Just look at that face. It makes me laugh when I see it.
I have this oval baking dish and every time I use it I think "this lookes like Stewie's head", so this is how the idea was born. I made this beef salad and decorated with 2 slices of potatoe, peas and pickles. The result is awesome.
You can make it with anything as long as you have an oval serving or baking dish. It's even funnier if it has handles. So next time you make potato salad, chicken salad, pasta salad or tuna salad... maybe you will see Stewie in your dish :-)

Anita B - all rights reserved
Ingredients:
4-5 potatoes
2-3 carrots
1 parsley root
1 can green peas
2 pickles
1/2 lb poultry breast or beef sirloin
½ cup mayo
1 tablespoon mustard
Salt
Black pepper


Anita B - all rights reserved
Directions:
Boil the vegetables with the meat in a large pot. When cool enough to handle, cube the meat, potatoes, pickles and all other vegetables. Place all in a bowl, add the peas and salt.
In a separate bowl, mix mayo and mustard. Season with salt and black pepper. Add 3/4 of the mayo mixture to the meat and vegetables and mix well. Arrange on a serving platter.
Smooth with a knife and then cover with the rest of the mayo mixture. (optional)
Serve on a slice of fresh bread.


Tags: salata de boeuf recipe, boeuf salata recipe, beef salad recipe, french salad recipe, boeuf salata recipes, stewie salad, stewie recipe, stewie griffin face food, recipe with pictures, cartoon face food recipe

Monday, October 31, 2011

Halloween Chocolate Marshmallows

Happy Halloween everyone!

Nothing easier than melted chocolate and some marshmallows. Take a toothpick and go crazy. The result: cute little monsters. I love them on my hot chocolate. It makes my day :-)

Anita B - all rights reserved


Anita B - all rights reserved

Tags: halloween treats. easy halloween treats, quick halloween treats, halloween marshmallow treats, frankenstein marshmallows, halloween marshmallows treat, Halloween Chocolate Marshmallows, halloween recipes, halloween desserts, hot chocolate with marshmallows

Sunday, October 30, 2011

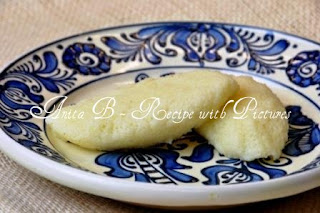
Semolina Dumplings - Griz Galuska

One of my readers, Andrea asked me to put this recipe on the blog. This is how I make semolina flour dumplings for hungarian chicken soup. They are super fluffy and easy to make. This is the "formula":  make sure you use 4 tablespoon of semolina per 1 large egg (not medium or jumbo). You can cook them in the soup, my mother cooks the dumplings in simmering water and when they are done she transfer them to the soup. It's up to you. Good luck


Ingredients:

1 large egg
4 tablespoons semolina flour
a pinch of salt


Directions:

Bring water to a boil in a large pot.


Beat egg with salt in a bowl.

 
Add the semolina flour all at once and mix well. The mixture should be thick (like sour cream).
Let it rest for about 15 minutes. The semolina flour will absorb the egg.

 
Turn the heat to low. Using a teaspoon form dumplings and put them in the simmering water.
Don’t overcrowd. Cover with lid and cook dumplings on medium heat for about 5 minutes, flip them on the other side, put the lid back and cook for another 5-10 minutes, depending on the size of the dumplings.
Turn off heat and let them stay in the hot water for 10 more minutes.

 
Add cooked dumplings to the soup.


Note:
I don’t like to cook the dumplings in the soup because they will absorb the soup.
Some recipes call for butter, or oil, or you have to beat egg whites and then add the rest of the ingredients.
Use 1 large + 4 tablespoon of semolina to achieve the right consistency. Use measuring spoon.
You can measure the eggs and the semolina flour, so for a 70-75 g egg add about 50 g semolina.


Tags: semolina dumplings for Hungarian chicken soup recipe, semolina dumpling recipe, grizgaluska recipe

Thursday, October 27, 2011

White Chocolate Strawberry Ghosts

Is this creepy or sweet? I don't know but they put a smile on my face. First of all they are easy to make, they are pretty healthy and super cute. No trick here, just treat :-) Happy Halloween everyone!

Ingredients:
6 oz white chocolate chips
1 oz semisweet chocolate chips
1 pound strawberries with stems (about 20), washed and dried very well

Directions:
Line a sheet pan with parchment of wax paper.
Melt white chocolate chips in the microwave according to package directions in a small, deep microwave resistant mug or bowl. Stir until smooth.
Make sure the strawberries are dry.
Holding the strawberry by the stem, dip it into the melted white chocolate, lift and twist slightly, letting any excess chocolate fall back into the bowl. Place on wax paper to dry.
Repeat with the rest of the strawberries.
Set the strawberries aside until the chocolate sets, about 30 minutes.
Once dry, warm dark chocolate in the microwave and pour it in a ziploc bag. Close bag and cut off the bottom corner off the bag and pipe on ghost eyes and mouths. Set on wax paper until dry.
Cut off stem and arrange on a platter.

Tags: White Chocolate Strawberry Ghosts, White Chocolate Strawberry Ghosts recipe, White Chocolate Strawberry Ghost recipes, halloween treats, healthy halloween recipes, healthy halloween treats, easy halloween recipes, quick and easy halloween recipes, halloween recipes, halloween treats recipe

Tuesday, October 25, 2011

Diplomat Cake

Ingredients:

For the cake:

8 large eggs at room temperature
8 tablespoon fine granulated sugar
8 tablespoon flour
1/8 teaspoon baking powder
 
For the filling:

6 eggs
6 tablespoons sugar
250 ml milk
30 g gelatin
500 ml heavy cream
1 can pineapple chunks (like Dole), drained – reserve juice
1 can peach halves in syrup (like Del Monte)
100 g raisins soaked in rum


To decorate:
whipped cream
2-3 Kiwis, thinly sliced
Peaches, thinly sliced
Pineapple, chopped
Raspberries

Directions:

Preheat oven to 350°.
Grease a round baking pan, line sides and base with paper. Grease the paper.
In a bowl, mix the egg yolks with the sugar. Beat on high speed until pale, thick and fluffy, about 5-7 minutes. Sift the flour over the egg mixture.
In a large bowl, beat egg whites with an electric mixer until thick and creamy.
Using a rubber spatula, fold the whites into the yolk mixture, add the flour and the baking powder and mix gently until no streaks remain.
Spread the mixture into the prepared pan.
Bake for 20 to 25 minutes until just golden brown (when cooked a toothpick inserted in the center will come out clean).
Remove the cake from the oven and turn immediately on to wax paper or a towel. Pull off the parchment paper gently.
Let the cake cool in the pan for about 10 minutes, take it out and let it cool completely on a cooling rack. When cool, cut it in 2 layers.

The filling:
In a bowl, mix the egg yolks with the sugar until light yellow, fluffy and the sugar is dissolved. Add the milk to the egg yolk mixture slowly and mix well. Put it in a double boiler and cook until becomes thick, whisking constantly for about 5 minutes.
Dissolve gelatin in cold water or pineapple juice and whisk the gelatin into the warm pastry cream. Let it cool.

If you are using heavy cream, beat the cream in a bowl until stiff, then add it to the pastry cream. If you have whipped cream from the store just fold it in the pastry cream, adding it gradually.
Whip egg whites. Add the egg whites, raisins and drained pineapple chunks, peaches to the cream and mix it gently.


Assembling:

Line the baking pan with parchment paper on the bottom and on the side.
Drizzle the cake with pineapple juice.
Place the first half of the cake on the bottom of a spring form pan, cut side up.
Pour the pastry cream over the cake.
Place the second half of the cake on top of the cream, cut side down.
The cake has to stay for at least 4 hours in the refrigerator, or overnight, then the cream will be set.
After about 4 hours (or in the morning), remove the side of the spring pan, take the cake out, place it on a platter, and decorate it with whipped cream and fruits.


Note:
You can buy a vanilla cake and make just the filling if you want to save time.
You can make it with ladyfingers also. Sprinkle them with pineapple juice and place them on the side of the spring pan and on the bottom. Pour half of the cream on the first layer of ladyfingers, place another layer of ladyfingers on the cream and pour the remaining cream on top. Refrigerate for at least 4 hours.

Tags: diplomat cake recipe, diplomat recipe, tort diplomat recipe, fruit cake recipe, diplomata recipe 

Sunday, October 23, 2011

Baked Jalapeno Peppers with Mozzarella Cheese

Ingredients:

jalapeno peppers
mozzarella cheese
salt
black pepper

 
Directions:

Preheat oven at 350F.
Place a cooling rack in a baking tray and lay a piece of aluminum foil on top of the cooling rack (for easy cleaning). I use the cooling rack to keep the jalapeno peppers from moving.
Cut each jalapeno lengthwise, and remove seeds and membranes. Wear rubber disposable gloves when you clean the jalapeno chiles.
Cut Mozzarella in long pieces and fill the jalapeno halves with cheese.
Season with salt and black pepper.
Bake in preheated oven for about 25-30 minutes.
Serve hot.

Tags: jalapeno poppers baked recipe, jalapeno poppers recipe with photo, jalapeno poppers recipe, baked jalapeno poppers

Wednesday, October 19, 2011

Baked Acorn Squash with Maple Syrup

Quick and easy recipe for fall.
You might serve this as a side dish, but for me this is dessert :-)
I made it with butter and maple syrup, but you can use cinnamon, or brown sugar, thyme, salt, black pepper the sky is the limit. Super easy and super delicious.

Ingredients:
1 acorn squash
2 teaspoon good quality Maple Syrup
2 teaspoon unsalted butter, melted

Directions:

Preheat oven to 400ºF.
Melt the butter in the microwave and allow it to cool slightly. Add the maple syrup to the butter mixture and stir it together well. Set aside.
Cut the squash in half. Using a spoon, scoop out the seeds and stringy inside in the center of the squash.
Score each half several times with a knife. Place the 2 halves in a baking dish on aluminum foil.
Evenly divide the butter mixture amongst each squash half.
Using a brush rub the inside of the squash cavity and the entire cut side.

Roast in a baking dish for about 1 hour, or until squash is easily pierced with a fork. Brush the butery maple syrup on the squash 2 or 3 times while baking.
Remove from oven. Cool and serve.

Enjoy it!

Tags: Baked Acorn Squash with Maple Syrup recipe, Roasted Acorn Squash with Maple Syrup, Acorn Squash with Maple Syrup recipes, Baked Akorn Squash recipe

Sunday, October 16, 2011

French Bread

Today is World Bread Day. This is the 5th Annual World Bread Day. Click here to read more about this event.
I invite you to talk about bread, to bake a bread, to eat a slice of bread.
If you baked a loaf of bread today, october 16, please leave a comment and put a link with your bread recipe on my blog. Let's show the world how much we love bread.

I bought a nonstick baguette pan and I decided to bake French Bread. I used my bread machine to knead the dough and I baked the baguettes in the oven. Here is the recipe I used from the instruction manual of my Welbilt bread machine. It was so good with a crunchy crust, soft inside..... and it was gone within minutes of being pulled from the oven.

Ingredients:

Dough:
1 cup + 2 tablespoon water
1 teaspoon salt
2 teaspoons sugar
3 cups bread flour
2 teaspoons active dry yeast

Glaze:
1 egg white
2 teaspoons sesame seeds, toasted (optional)
Place ingredients in bread machine in the order listed. All ingredients must be at room temperature.
Start machine on dough setting.
When dough cycle is complete, remove it with floured hands and place it on floured surface.
Let it rest for 5 minutes and then cut in half.
Take each half of dough and roll to make a loaf about 12 inches long in the shape of French bread.
Place on greased baking sheet and glaze each baguette with egg white.
Slash 5 times diagonally with a very sharp knife or a pair of scissors.
Place in a warm place and let rise until doubled in size, about 1 hour.

Preheat oven to 400°.
Glaze uslashed portions again with egg white.
Bake on the middle rack for 20 to 25 minutes or until golden brown.
Remove baked loaves to wire racks to cool.

Tags: French Bread recipe, French Bread kneaded in machine baked in the oven, French Bread recipes, French Bread recipes with photos, French Bread recipe with pictures

Friday, October 14, 2011

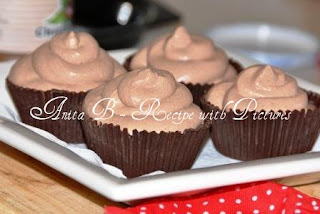
Chocolate Whipped Cream in Chocolate Cups

For the chocolate whipped cream:
500 g heavy whipping cream
100 g semisweet chocolate, broken in small pieces
2 tbsp dark rum

Combine the cream and chocolate in a heavy saucepan and stir over medium heat until the chocolate melts. Then reduce the heat to very low and simmer, stirring constantly until the mixture thickens. Pour it into a bowl and refrigerate for at least 1 hour. When the mixture is very cold beat with an electric mixer until the filling is smooth and creamy and forms soft peaks when the beater is lifted from the bowl. Do not overbeat or the cream will turn to butter.

Chestnut puree choco cups
For the chocolate cups:
1 cup semisweet chocolate chips

Melt Chocolate Chips in a microwave safe bowl in a microwave for around 1 ½ minutes or till the chips are almost melted. Follow the instructions on the package.
With a food grade brush, paint the inner part of the cup cake liners and place them in a Muffin pan to keep their shape. You can do this with the back of a teaspoon if you don’t have a brush.
Repeat this with all the liners and keep in the fridge for 20 minutes. 
Use the leftover Chocolate to coat the Chocolate cups once more to ensure the strength of the cups. If the reserved Chocolate hardens, do melt it in the microwave for a few seconds.
Peel the cup cake liner off and fill the Chocolate cups with the mousse.
Pour the chocolate whipped cream into a piping bag or a ziploc bag and fill the chocolate cups with it. Sprinkle with chocolate shaving.
Enjoy it.
Note: You can fill the cups with chestnut puree and then top it with the chocolate whipped cream.... yummmmm

Tags: Chocolate Whipped Cream in Chocolate Cups recipe, dessert recipes, Chocolate Whipped Cream in Chocolate Cups, quick and easy dessert recipe, quick and easy dessert idea

Monday, October 10, 2011

Crispy Bacon Strips

Why does everybody love bacon? Because everything is better with bacon. :-)
After all, what would breakfast be without crispy bacon strips? Eggs with bacon, French toast with bacon, pancakes with bacon, great on a sandwich or salad.... I love it.
You can even buy chocolate bars with bacon.
There are many ways to cook bacon, one of my favorites and a very easy way to cook it is in the oven. No mess in the kitchen with all the bacon fat.
So let's see how we bake it.

Ingredients:

bacon
black pepper

Directions:

Line a baking sheet with foil for an easy cleanup.
Preheat oven to 400°F.
Place bacon slices on the foil or on cooling rack used for cookies.

Season with black pepper and place the baking sheet on the center rack in the oven.

Bake 15 minutes or until golden brown. The exact time will depend on the thickness of the bacon slices. Bacon gets crisper as it cools. 
Remove from the oven.
Arrange bacon slices on a plate lined with paper towel to absorb the fat.

 Serve on a sandwich or salad, with french toast, or on soup... the sky is the limit.
Enjoy it!

Tags: Crispy Bacon Strips recipe, Crispy Bacon recipe, bacon recipe with pictures, bacon recipes, oven baked bacon, bacon in oven, bacon strips, bake bacon recipe

Friday, October 7, 2011

Baked Salmon Fillet with Dijon and Panko

With just a few ingredients and maybe 2-3 minutes of preparation you can have a great dinner. You can't go wrong with this recipe.

Ingredients:
2 salmon fillets
2 teaspoon Dijon mustard
1/4 cup Panko
2 teaspoon butter
garlic powder
salt
black pepper

Directions:
Preheat oven to 400 degrees F (200 degrees C). Oil a baking sheet or line it with aluminum foil.
Place salmon skin-side down on foil. Season it with salt, pepper and garlic powder.
Cover the fillets with a thin layer of mustard.
Melt butter. Mix Panko with melted butter and spread the mixture on the fillets.
Bake in a preheated oven for 15 minutes, or until salmon flakes easily with a fork.

Note:
If you don't want to melt the butter, just top the Panko with cold pieces of butter. It will melt in the oven.
If you want to save some calories, skip the butter.
If you turn on the broiler at the end for about 1 minute you will have a super crunchy crust and more color.
You can use a spicy mustard for more flavor.

Tags: Baked salmon fillets with Dijon and Panko recipe, Baked salmon fillet recipe, Baked salmon fillets with mustard recipe, Baked salmon recipe

Tuesday, October 4, 2011

Spekulatius S'Mores

Every year before Christmas I receive Spekulatius biscuits from my brother. They are really special for me :-)
For those who didn't hear about them, Spekulatius is a Dutch/German Christmas cookie. Delicious crunchy biscuits, they are very thin, with different flavors, like cinnamon, nutmeg, ginger and super cute shapes, like St. Nicholas, windmill, elephant, sheep...
We all love s'mores. I wanted to make them with Spekulatius biscuits this time - for my brother :-)

Ingredients: (for 5 s'mores)
10 Spekulatius biscuits
10 medium marshmallows
chocolate (I used Lindt bittersweet)

Directions:
Preheat oven to 300°F.
Line a cookie sheet with aluminum foil, shiny side up.
Place 5 cookies/biscuits on the lined cookie sheet.
Top each cookie with 2 marshmallows.
Bake for about 4 minutes.
Remove from the oven.
Place the chocolate pieces on top of the marshmallows (3 squares) and cover with the rest of the Spekulatius cookies.

They are to die for :-)

Tags: Gewurtz-Spekulatius s'mores recipe, Gewurtz-Spekulatius with chocolate and marshmallows recipe, Spekulatius s'mores recipe, oven baked Spekulatius s'mores recipe

Tuesday, September 27, 2011

Portabella Burgers

Ingredients for 2 burgers:

4 large portabella mushroom caps
2 tablespoons olive oil
1 teaspoon dried basil
1 teaspoon dried oregano
1 tablespoon minced garlic
salt
black pepper
4 slices provolone cheese
Garlic mayo (1 tablespoon mayo mixed with 1 clove garlic, crushed)

Directions:

In a small bowl, whisk together oil, basil, oregano, garlic, salt, and pepper.
Brush the mushrooms generously with the olive oil mixture.
Preheat grill for medium-high heat.
Brush grate with oil. Place mushrooms on the grill, stem side down.
Grill for 5 to 8 minutes on each side, or until tender.
Top with cheese during the last 2 minutes of grilling.
Put 2 mushroom caps on a bun with garlic mayo, roasted red pepper, red onion and arugula.

Tags: Portabella Burger recipe, Portabella Burgers recipes, Portobello Burger recipe, Portabella Cheeseburger recipe, Portabella recipe, Portobello recipe, grilled Portabella Burgers

Monday, September 26, 2011

Tiramisu

I asked my boyfriend to do the groceries and he came home with everything I asked him to buy, plus some other things like ladyfingers and mascarpone :-) He bumped into a shelf with Savoiardi and now I had to make tiramisu. We made the tiramisu together, I made the cream, he soaked the ladyfingers in the coffee and layered them in the dish.
We followed the recipe from the back of the package and I have to tell you it was delicious.


Here is a photo with the recipe. I swear I am too tired to write it down. Click on the photo to enlarge it.


I used a 8.5"x8.5" baking dish. We had to trim the ladyfingers to fit them in the dish.

The liquor I used for the cream was St Remy brandy. It was very good.

This was the first tiramisu I made and I was very happy with it. We both loved it. I will make it again :-)

Tags: Tiramisu Balocco Savoiardi recipe, tiramisu recipe, tiramisu recipe with picture, tiramisu recipe with photo, tiramisu photo, tiramisu recipes, savoiardi tiramisu recipe

Monday, September 19, 2011

Chocolate Chip Cookies in a Jar

Cookies in a jar. Love it.
I was so excited about the cookies I made for my dad that I decided to put the dry ingredients in a jar. This little project was so much fun to make. I love to make gifts. Now my mom can make him the cookies anytime in just minutes. She just have to cream the butter and the eggs, mix it with the ingredients from the jar and make the cookies. So easy.

This is the Quaker oatmeal cookies recipe, modified for my dad. I posted the recipe yesterday (click here to see it), but I think this jar deserves a new post.
He has type 2 diabetes and he cannot eat the same desserts we enjoy. This is why I made him something special.
They freeze well so he can have dessert once in a while, he just needs to take one out from the freezer :-)

What you need:

30 oz (850 g) jar
12 packets of Truvia or other sweetener equivalent of ½ cup granulated sugar
1- ½ cups almond flour
1 teaspoon baking soda
½ teaspoon salt
3 cups Quaker Oats (quick or old fashioned, uncooked)
2 sugar free chocolate bars, broken in small pieces
1/2 cup almonds or other nuts, chopped (optional)
Whole almonds to top each cookie


Directions:

Layer the almond flour and sweetener in the jar packing well between each layer.
Add the oatmeal and press well.
Add the baking soda and salt.
Add chocolate pieces. If you still have room in the jar you can add chopped almonds or other nuts.
Put the lid on the jar.
Put the whole almonds in a tiny bag.

Use a nice fabric or a napkin to cover the lid. Secure it with a rubber band. Lift the rubber band and place the bag of almonds under.
Cover the rubber band with a nice ribbon or whatever you think will look good. Cut the corners of the napkin.
That's it.

How to make the cookies:
½ cup (1 stick) plus 6 tablespoons butter, softened
2 eggs

Preheat oven to 350°F.
In large bowl, beat butter eggs with electric mixer until creamy.
Add the dry ingredients from the jar and mix well.
Drop dough by rounded tablespoonfuls onto ungreased cookie sheets.
Top each cookie with 1 almond.
Bake 8 to 10 minutes or until light golden brown.
Cool 1 minute on cookie sheets; remove to wire rack.
Cool completely. Store tightly covered.

Tags: Chocolate Chip Cookies for Diabetics, cookies for diabetics, Chocolate Chip Cookies recipe for Diabetics, gluten free Chocolate Chip Cookies recipe, diabetes friendly recipes